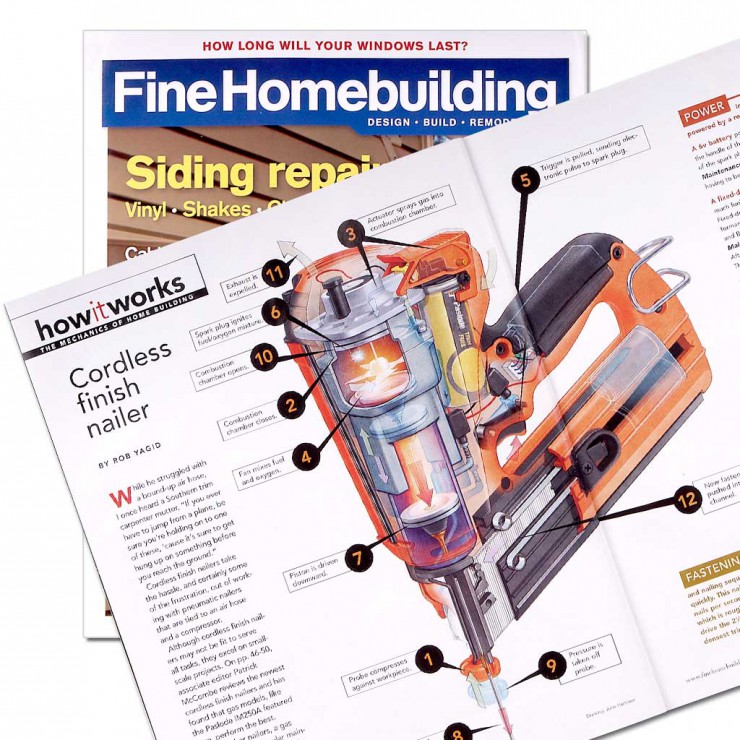
How I created this digital illustration for Fine Homebuilding Magazine
- Executive Art Director: Robert Goodfellow
- Deputy Art Directors: Dan Thornton and Rodney Diaz.
A Clear Line Drawing is Key
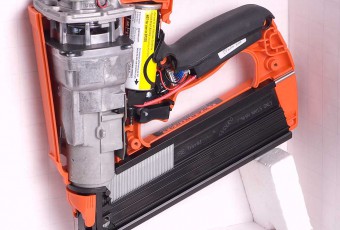
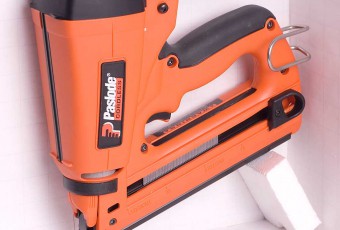
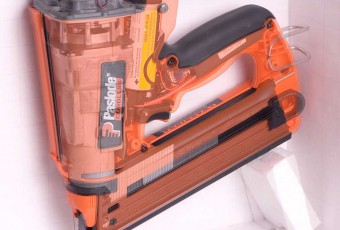
The foundation of any technical illustration is an accurate and detailed line drawing. To create the line drawing for the nail gun digital illustration, I took several photos in various stages of dis-assembly from a carefully chosen view point with my digital SLR mounted on a tripod. The nail gun was placed in a three sided box for each shot, I was careful to replace it in the same position each time. The box was surfaced with grid paper to help with establishing the perspective. The photos were then taken into Adobe Photoshop and re-assembled in layers.
Using an Underlay Photo to Help Create an Accurate Perspective
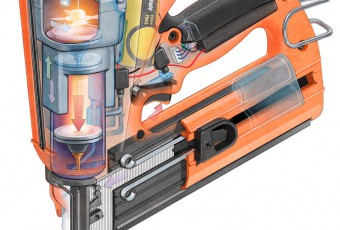
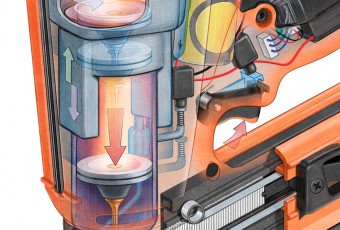
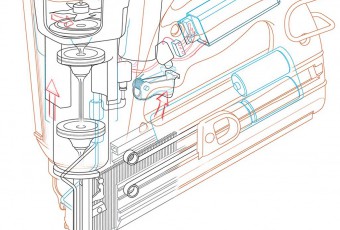
The composite Photoshop file was placed as an underlay in Adobe Illustrator and an accurate line drawing was created. I used the grid lines to help create a precise perspective. I find that just tracing the photograph is not good enough and tightening up the perspective goes a long way towards creating a convincing illusion. When creating technical illustrations that show the inner workings of a mechanical product it is often necessary to simplify for clarity. As you can see in the underlay photos, in the area of the combustion chamber, there is quite a bit of detail to the casting. I chose to simplify and re-form the area to clarify how the telescoping action of the combustion chamber works.
Setup an Illustrator-Photoshop loop
During this process I find it helpful to place the illustrator file back into the composite PSD, forming a loop between Photoshop and Illustrator. I often work this way since it allows me to sketch ideas with my Wacom Cintiq in a Photoshop layer then update the placed PSD in illustrator. This way the sketched elements can be refined in vector form. You can see this in the line drawing with the sketched arrows that have not yet been cleaned up in Adobe Illustrator.
Use Photoshop for Color and Shading
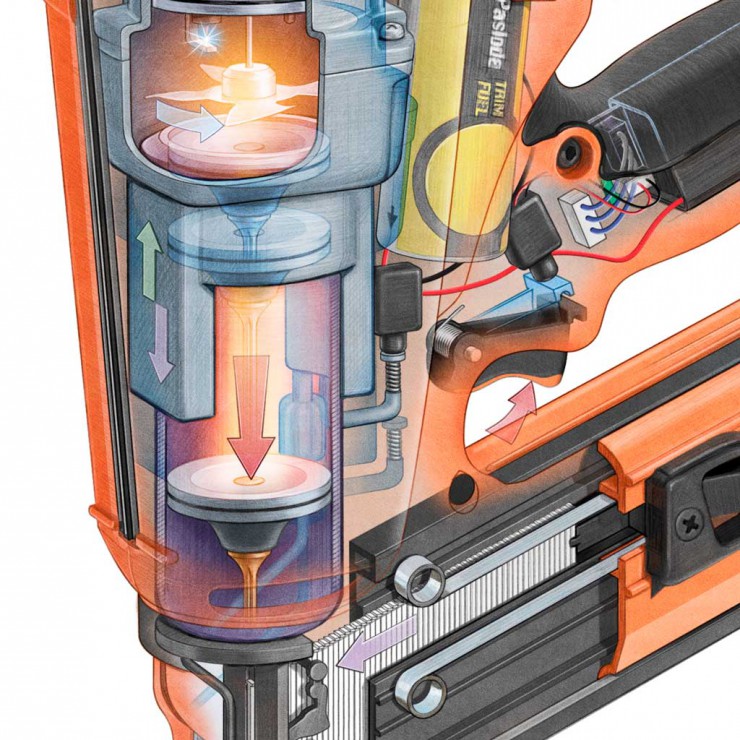
I like to use Illustrator to create clean accurate line drawings but I prefer to do the rest of the rendering in Photoshop. Illustrator can be used to create complex blends that can look convincing but this is very time consuming work and the results look too slick to me. It is faster and more natural to use Photoshop’s brushes pared with the Wacom Cintiq to paint the tones and colors. Multiple layers were used, often with masks to create the phantom views of the interior of the nail gun. To get a good look for a phantom (transparent) illustration, its best to fully render the shell that you plan on fading away. A mask is applied to the layer or more likely the layer group and a soft brush set to a low opacity is used to fade areas out as needed. To do this right, you will also need a colored layer behind everything so, as you fade the foreground, the white paper in the background is not seen. For this illustration I used a lighter and less saturated version of the bright orange case color of the nail gun.
Textures Pull the Illustration Together
If you examine the detail of the finished illustration you can see the textures I use. There are two types of textures, first a global texture that simulates the paper texture. This helps to unify and harmonizes the rendering. Without the texture the rendering would look uneven and have that slick look that I hate about much digital illustration. The second type of texture is the hand rendered hatching which helps to create the illusion of looking through transparent materials and also helps to reinforce the forms.
If you would like to learn more about my illustration techniques please visit my illustration tutorial pages.
